Definition: a custom view is a set of settings (filters, groups, sorting, columns) applied to the information of some Beeye pages (employees, projects, tasks, clients) to highlight the data you need most.
Step 1: Create a new view
Click on the Create a view button in the left-hand menu. The new view appears in the list in the left-hand menu, ready to be set up and adjusted.
Step 2: Select the columns
Are you looking to check the times entered by employees last week? By selecting the columns you need, you limit the information to what is necessary to make your decision, find what you need, and perform the action you want.
To edit the columns, click on the Columns button, then in the right panel, click to add, delete or move the columns as you wish.
Step 3: Select filters
When used properly, filters allow you to quickly pinpoint data with meaningful criteria. For example: only display closed assignments; only employees with a given position; only clients with a particular closing date; etc.
To add filters, click on the Filter button, then in the right panel, click to add, delete or modify filters as desired.
Step 4: Group Information
Groups allow you to add structure to the information displayed by grouping the rows according to a criterion of your choice.
For example, you can group your missions by category or by manager; your employees by position or by team; your tasks by status.
Step 5: Sort the data
Sorting allows you to add a ranking to the information displayed.
For example, you might want to display your employees in order of availability to find the most (or least) available, or display your assignments by scheduled time, to identify assignments that are still to be scheduled.
Tip: edit, share views
In the left menu, click on the "manage views" button located at the bottom. Select the view you want to modify to access the quick actions (hide, rename, duplicate, set as default, make public, delete).
Other display options: some pages, such as the planning page, offer other options that are also saved in the views, such as setting the information contained in the cards displayed on the planning.
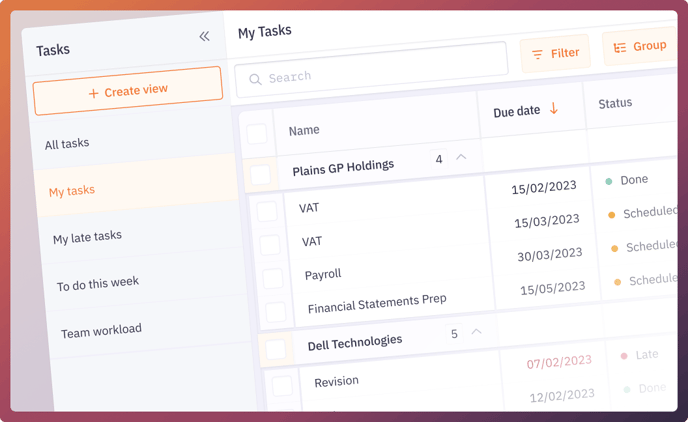
Case study: create "my overdue tasks" view
- From the Tasks menu, click on the Create view button located on the top left
- Click on the Filter button and add the following 2 filters:
- Responsible: select yourself in the list of collaborators
- Deadline: select "This year to date" then click on the Apply button
- Click on the Group button and select Status
- To save your view, click on the Save button on the top right
- To rename your view:
- Click on the Manage Views button at the bottom left of the interface
- Click on your view to bring up the options then click on Rename and enter the name "My Overdue Tasks"
- Click on Save