Adding Columns
Adding columns allows you to display additional information in your table according to your needs.
Steps:
-
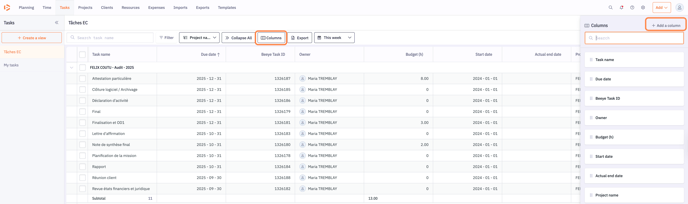
Go to the page containing your DataGrid (Tasks, Projects, Collaborators, etc.).
-
Click the Columns button at the top of the table.
-
Select Add Columns.
-
Choose the columns you want to display from the available options, then confirm.
-
The added columns will appear on the right side of the table. You can then move or resize them as needed.
Tip: Add only the necessary columns to keep the table clear and easy to read.
Removing Columns
Removing columns allows you to simplify the table by hiding unnecessary information.
Steps:
-
Go to the page containing your DataGrid (Tasks, Projects, Resources, etc.).
-
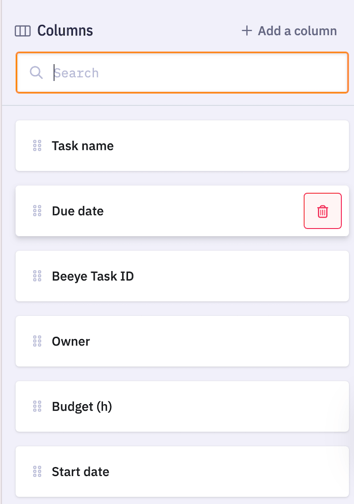
Click the Columns button at the top of the table.
-
Hover over the column you want to remove.
-
Click the trash icon to delete the column.
-
The removed columns disappear immediately, but you can always re-add them later via Add Columns.
Tip: Limit the number of visible columns to make the DataGrid easier to read and navigate.
Resizing Columns
Resizing columns lets you adjust their width to improve readability and organize your table according to your needs.
Steps:
-
Go to the page containing your DataGrid (Tasks, Projects, Collaborators, etc.).
-
Click and drag the column border to adjust it to the desired width.
Note: When resizing a column, other columns usually remain at their original width.
Tip: Adjust column widths to prevent text from being truncated and make the table easier to read.
🎥 Demo Video: Resize columns.mp4
Reordering Columns
You can change the order of columns in the DataGrid to better visualize your information.
Steps:
-
Click the Columns button.
-
Drag and drop the columns to reorder them as needed.
-
Click Save to keep the new layout.
🎥 Demo Video: Reorder columns.mp4